
In The Blood of Dawnwalker, this One Shot Build combines Artery Strike with bleed, activation charge restoration, and Perfect Block mechanics to make even Duelist difficulty much easier to manage. The core setup is surprisingly simple, but several supporting skills make the rotation considerably stronger as your character progresses.
The most important interaction is between Artery Strike from Swordmastery and Shred from Vampirism. From there, the build adds Walking Fortress, Adrenaline Rush, several activation charge passives, and King’s Slayer to keep the rotation working against multiple enemies.
You can find more character setups in our The Blood of Dawnwalker Builds section.
How The One Shot Build Works
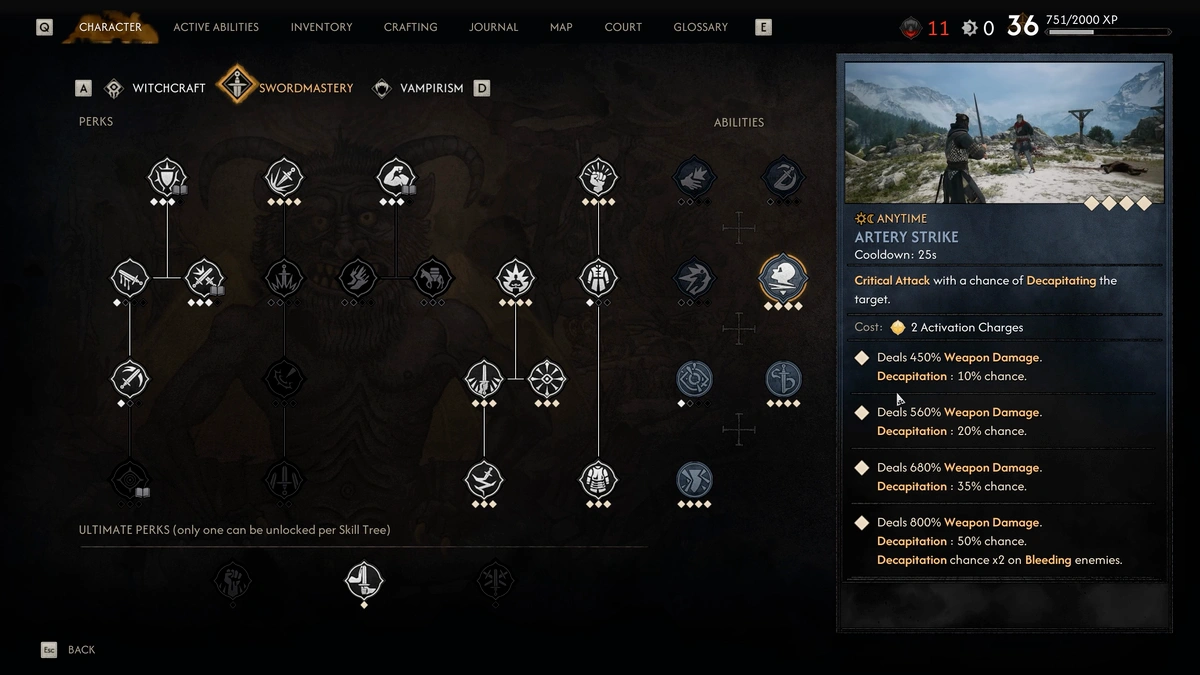
The foundation of this build is Artery Strike. At level 4, the skill deals 800% weapon damage and has a 50% chance to leave an enemy headless. More importantly, that chance doubles when the target is already bleeding.
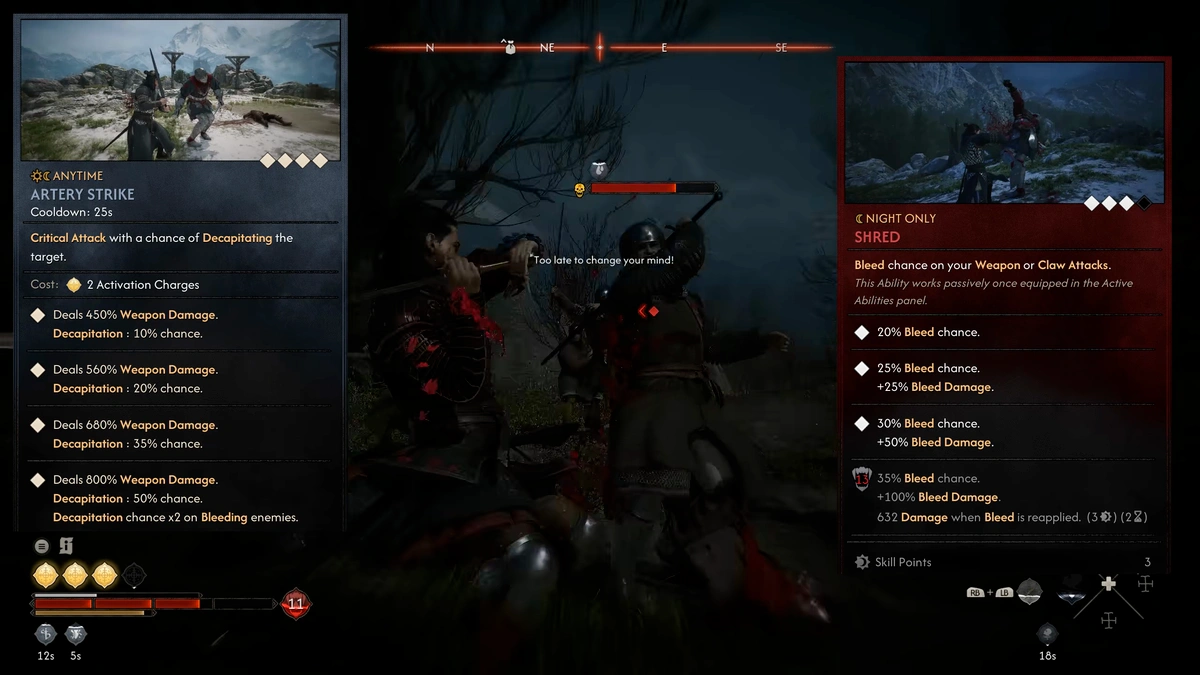
That interaction is what turns Artery Strike into the finishing move for the build. Instead of simply using it whenever it becomes available, the goal is to first create a bleed and then immediately follow with Artery Strike.
Because Artery Strike costs two activation charges, however, repeatedly using it requires more than raw damage. Much of the rest of the setup is therefore dedicated to restoring activation charges and reducing the downtime between attacks.
Combine Artery Strike With Shred
The second core ability is Shred from the Vampirism skill line. Shred provides a chance to apply bleed to enemies, eventually reaching 35% at level 13 according to the build shown in the gameplay.
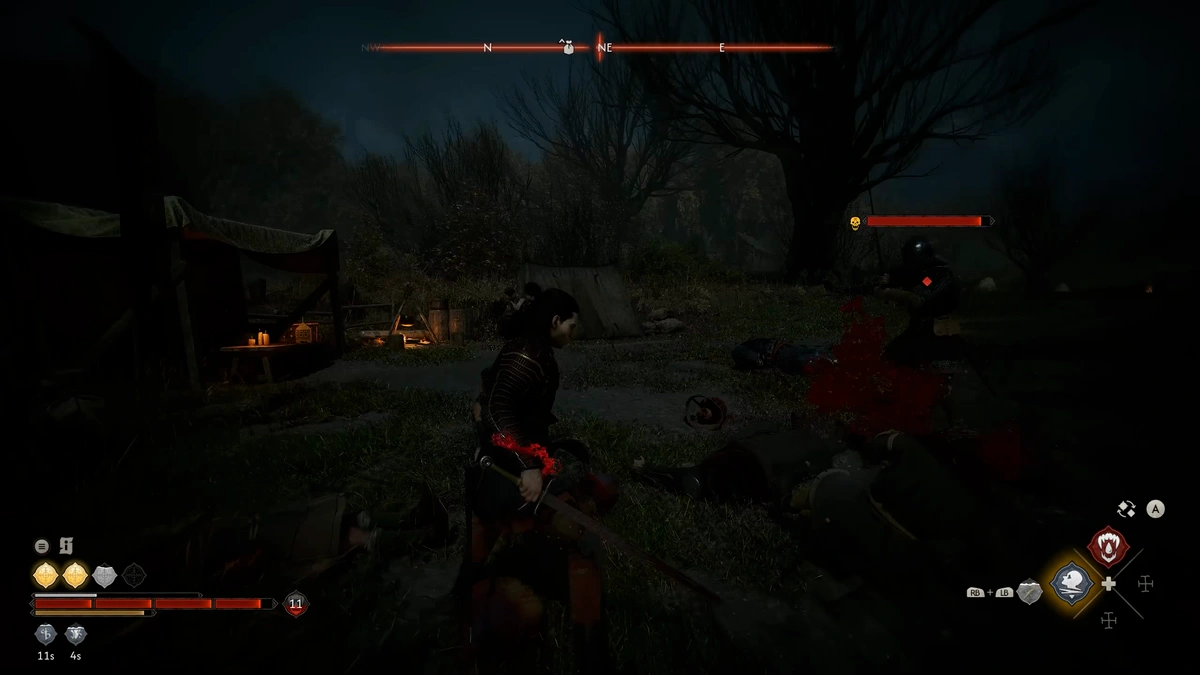
This is the key synergy: Shred helps create the bleed condition, while Artery Strike benefits from attacking a bleeding target. Once the target is bleeding, Artery Strike’s chance to trigger its headless effect is doubled.
You do not need a complicated multi-skill combo before every enemy. The practical goal is simply to apply bleed as quickly as possible and then use Artery Strike while the condition is active.
Use Walking Fortress For Activation Charge Restoration
After the two core skills are in place, the next priority is activation charge management. Walking Fortress is one of the most important supporting skills in this setup.
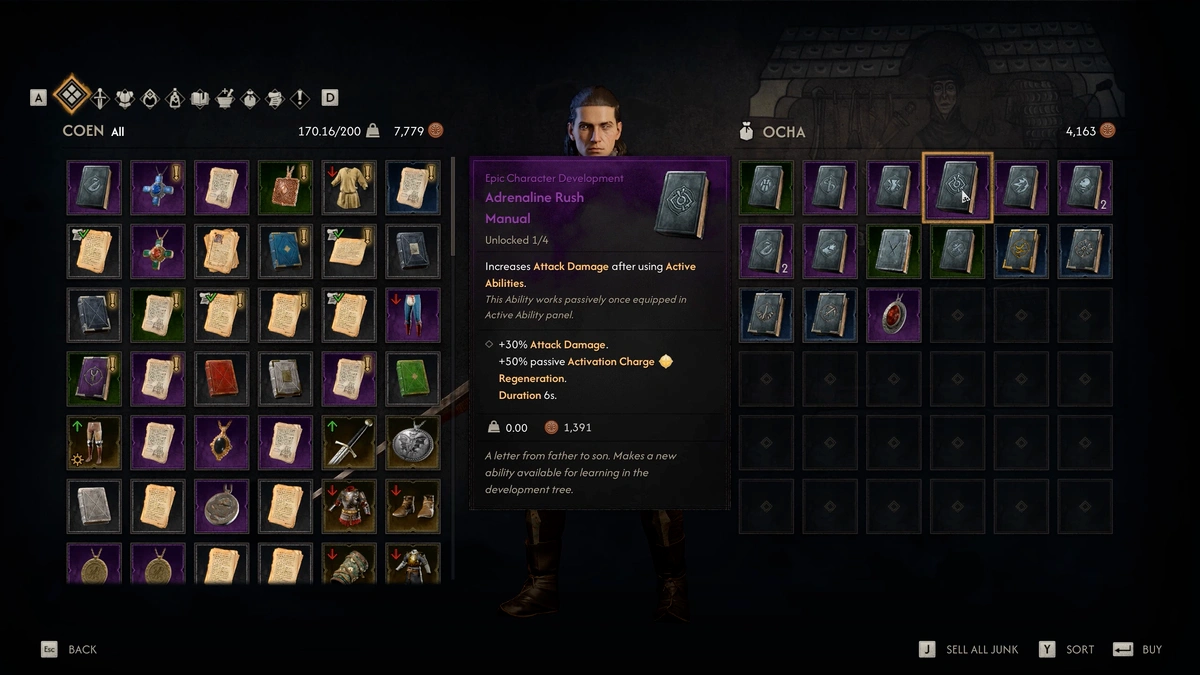
At level 4, Walking Fortress provides 25% activation charge restoration. It also reduces cooldowns on active abilities and Perfect Blocks, which directly supports the defensive rhythm of the build.
This becomes particularly useful before unlocking the Sword Sage capstone, which adds ability cooldown benefits from kills. Until then, Walking Fortress helps keep Artery Strike and the rest of the active setup moving more consistently.
Add Adrenaline Rush For Faster Regeneration And Damage
Adrenaline Rush adds another important layer to the build. Starting at level 2, the version described in the gameplay provides 50% passive activation charge regeneration together with a 30% increase to attack damage.
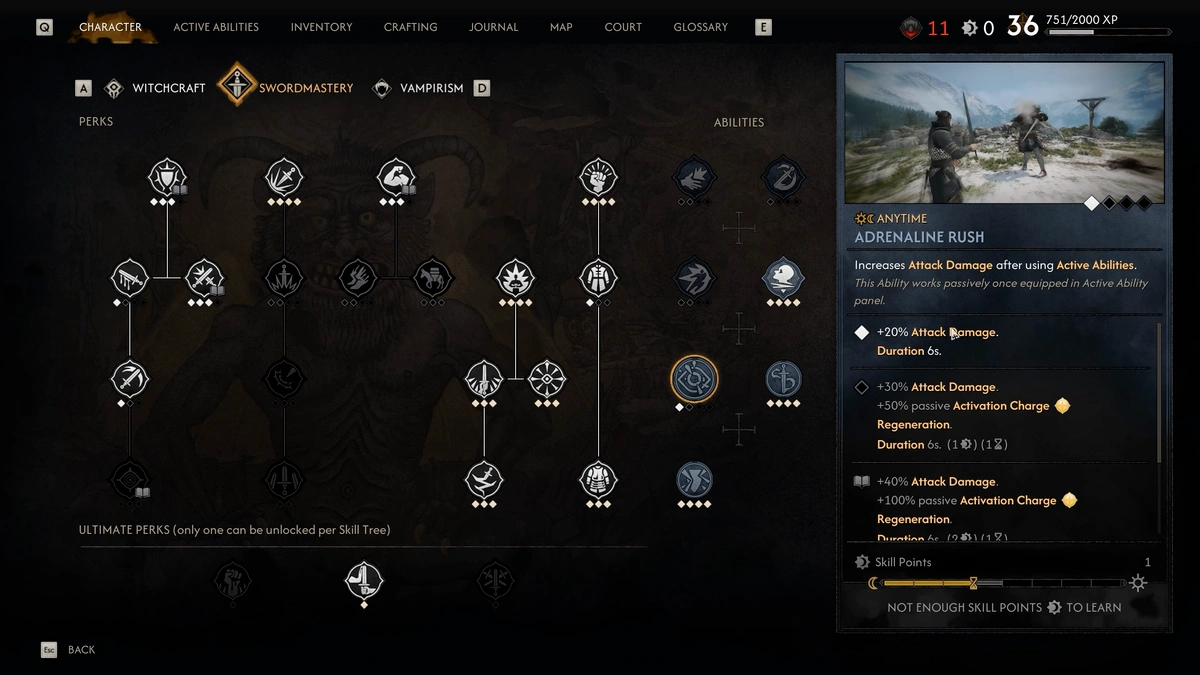
That makes it useful for both sides of the setup: it helps recover the resource needed for Artery Strike while also increasing your normal offensive output.
Additional levels can improve the skill further, so it is worth upgrading as the necessary manuals become available.
Use Perfect Block, Renewed Focus, And Restless Blade
The build also uses several passive skills to improve activation charge recovery and cooldown management.
- Perfect Block: increases activation charge recovery from successful Perfect Blocks and also restores stamina.
- Renewed Focus: provides additional activation charge restoration.
- Restless Blade: at its maximum level 3, provides 5% cooldown reduction on critical hits.
Restless Blade has particularly useful synergy with Artery Strike. When Artery Strike triggers the headless finishing effect, that attack counts as a critical attack for this setup. Repeated finishing attacks can therefore contribute to faster cooldown recovery.
This is why the build becomes much smoother once enemies begin falling. The first target helps start the cycle, and subsequent kills make it easier to continue using the same rotation against the rest of the group.
Best Vampirism Passives For The Build
Shred is the essential Vampirism passive, but two additional abilities can improve the setup.
Scarlet Shield becomes available after defeating Ambress and can add survivability through its healing effect. It is not responsible for the one-shot mechanic itself, but it gives the build more safety during longer encounters.
Crimson Rush increases the damage of active abilities when your HP is higher. Because Artery Strike is an active ability, Crimson Rush can further increase its damage when you enter the attack with high health.
These passives are especially useful when the instant finishing effect does not trigger and you still need enough raw damage to complete the kill.
Complete One Shot Build Skill Setup
The gameplay demonstration uses a complete setup built around the following skills:
- Walking Fortress as an active Swordmastery skill.
- Adrenaline Rush for passive activation charge regeneration and attack damage.
- Artery Strike as the primary finishing attack.
- Swiftness to improve attack speed.
- Shred to apply bleed.
- Crimson Rush to increase active ability damage at higher HP.
- Scarlet Shield for additional survivability.
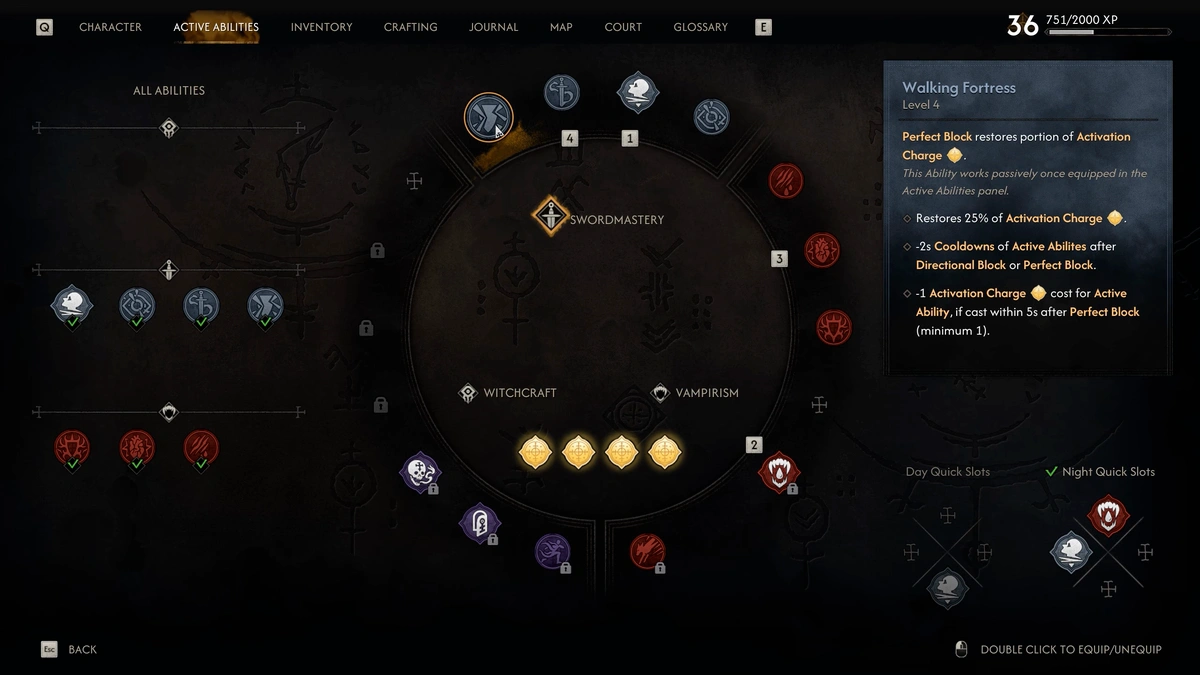
The setup requires enough passive skill slots to equip everything together, so additional Swordmastery and Vampirism slots become important as the build develops.
During nighttime, there is also room for an additional ability if you want more damage. The gameplay example mentions Shadow Storm from a blood vial as one possible option, but it is not required for the core One Shot Build to function.
Use Omni Block On Duelist Difficulty
If you are playing on Duelist difficulty, fully upgrading Omni Block is recommended for this version of the build.
Duelist removes the directional attack indicator, so you cannot rely on the usual arrow to tell you where an incoming attack is coming from. Instead, you need to watch enemy animations and react to their attacks directly.
Because Perfect Blocks are such an important part of activation charge restoration, making those defensive reactions easier has a direct effect on how consistently the build can continue its offensive rotation.
King’s Slayer Is The Recommended Sword
The recommended weapon for this version of the build is King’s Slayer. The gameplay specifically describes it as the preferred sword for this setup because of its Perfect Block support.
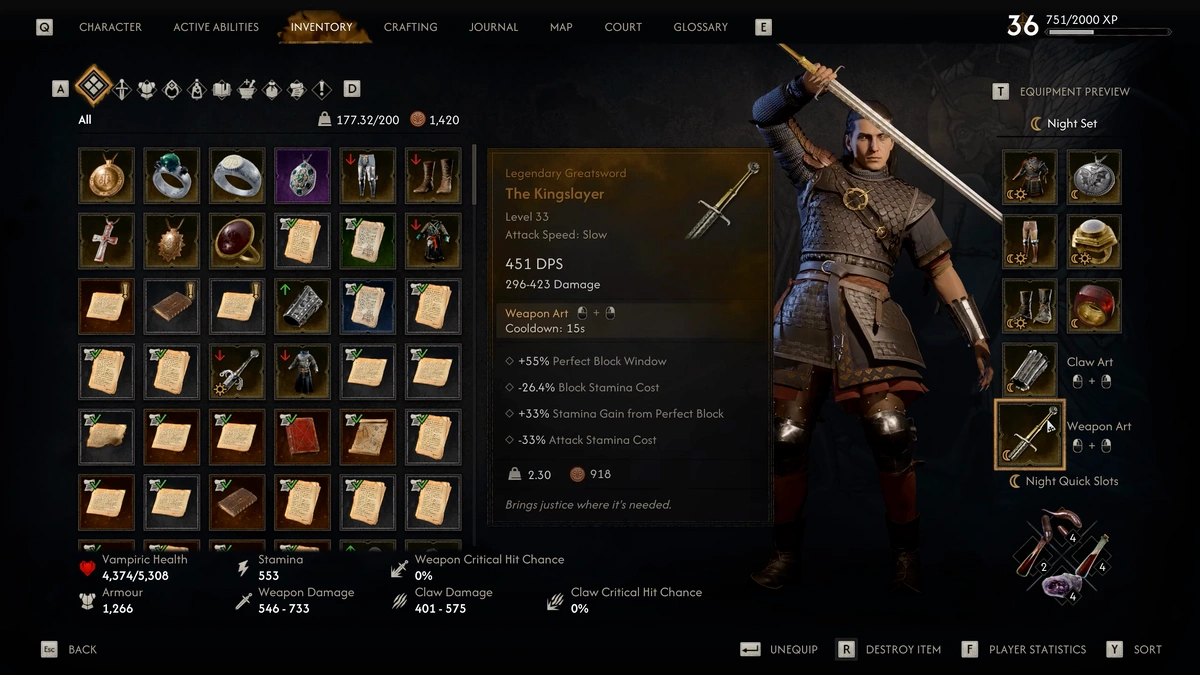
At the level shown in the build, King’s Slayer provides a 55% increase to the Perfect Block window. That makes timing Perfect Blocks considerably easier on Duelist difficulty and complements the activation charge mechanics used throughout the setup.
The weapon is not what creates the Artery Strike and Shred interaction, but it makes the defensive side of the build more forgiving and helps you generate the resources needed to repeat the combo.
How To Use The One Shot Build In Combat
Once the skills and weapon are equipped, the actual rotation is straightforward.
- Wait for an enemy attack and perform a Perfect Block.
- Use one or more quick attacks to try to apply bleed.
- Once the target is bleeding, immediately use Artery Strike.
- After the kill, use the restored charges and reduced cooldowns to move to the next enemy.
- Repeat the same sequence across the group.
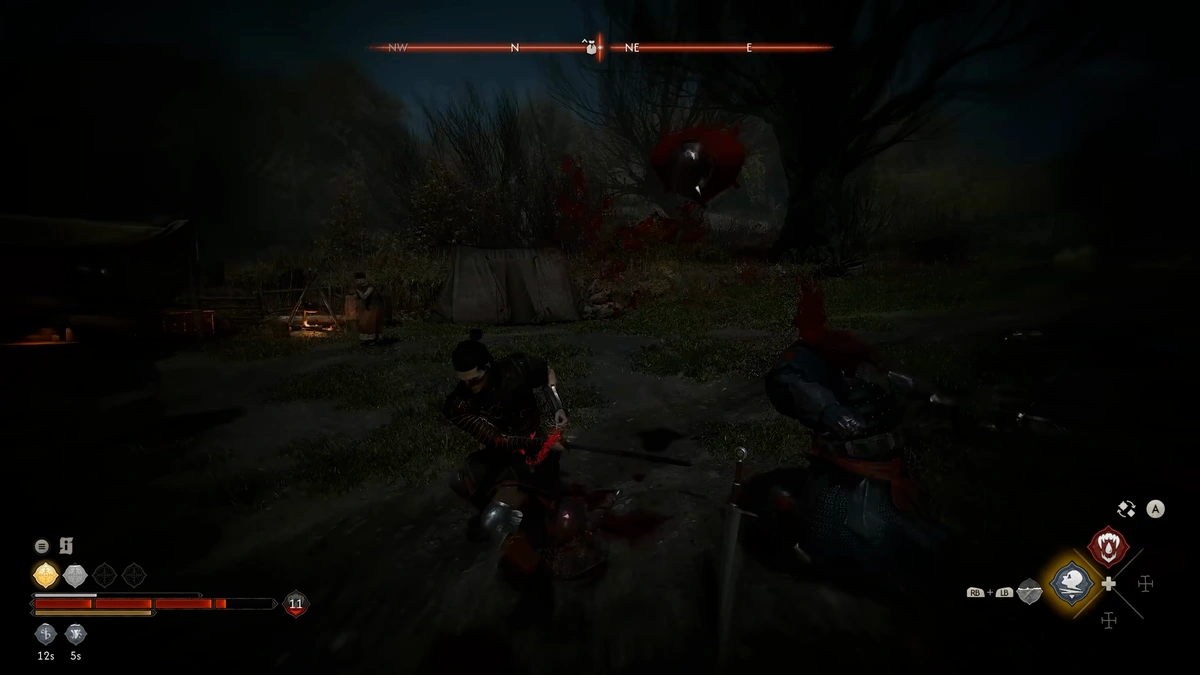
Weapon arts can also help apply bleed before Artery Strike. In the gameplay demonstration, the player alternates between Perfect Blocks, quick attacks or weapon arts, bleed application, and Artery Strike finishers.
Each defeated target helps the build recover cooldowns and activation charges, allowing the same sequence to continue against additional enemies. During the Duelist demonstration, the setup was able to take down almost every target in a single finishing sequence.
One Shot Build Combat Priorities
The easiest way to understand this setup is to separate it into three priorities.
- Apply bleed: Shred, quick attacks, and weapon arts help prepare the target.
- Maintain activation charges: Walking Fortress, Adrenaline Rush, Perfect Block, and Renewed Focus keep Artery Strike available.
- Finish with Artery Strike: use the active ability once bleed is applied to maximize the chance of the headless finishing effect.
King’s Slayer and Omni Block then make Perfect Block timing easier, especially on Duelist difficulty. This creates a loop where defense helps restore the resources required for your next offensive burst.
